Thursday, August 14, 2014

Raised in a Barn

Welcome to the KitchenIslandsPlus.com blog …

If the fam always seems to leave cabinet doors wide open; and if you are hate to walk into the kitchen and see cabinet door standing wide open, maybe you should treat the family like a horse and install barn-style doors. These sliding doors are an ideal compromise between standard doors and leaving your shelves open — you can hide the messes but still leave some areas open and airy. There are many styles and designs to choose from and a few are shown below ... And the family will no longer forget to close cabinet doors again.

Until next time …


Tuesday, August 12, 2014

Flighty Kitchen

Welcome to the KitchenIslandsPlus.com blog …

Doesn't this just give you butterflies in your stomach?


Until next time …

Thursday, August 7, 2014

Ultimate Dining

Welcome to the KitchenIslandsPlus.com blog …

Black lacquer finish, wine storage, finished wood top. This set is gorgeous!!


Until next time …


Tuesday, August 5, 2014

Adding Creative Space in Your Kitchen

Welcome to the KitchenIslandsPlus.com blog …

Liz Finn of Designing Domesticity has a small kitchen and needed more counter space. She used some creativity and found a sofa table that was the right size and shape she needed. She added bun feet to give the short table more height, and then topped it with a butcher block counter top for a really great work surface.


Until next time …

Thursday, July 31, 2014

Desk into Island

Welcome to the KitchenIslandsPlus.com blog …
  
Blogger Lesll DeVito of My Old Country House took her kids’ old desk and created a dramatic, yet practical kitchen island. She sanded and painted it and then added casters for mobility. The unique work surface is formica calacatta marble.


Until next time …

Tuesday, July 29, 2014

Copper Kitchen

Welcome to the KitchenIslandsPlus.com blog …

This copper-topped kitchen island has lots of nifty features!


Until next time …


Thursday, July 24, 2014

Star Trek Kitchen

Welcome to the KitchenIslandsPlus.com blog …

This kitchen looks as if it belongs on the Starship Enterprise!

Until next time … 


Thursday, July 17, 2014

Keeping White Kitchens White

Welcome to the KitchenIslandsPlus.com blog …

HOUZZ.com had some recent great ideas, tips and tricks on white kitchens that also apply to white kitchen islands and carts …

Many, many home owners have many, many concerns about how to keep very white kitchens very white and clean. However, you don’t have to be obsessive-compulsive to have an all-white kitchen. You only need some diligence and the tips listed below.

This is an ideal white kitchen because it looks as if no one ever cooks in it, which is the best way to keep a sparkling white kitchen. If you feel you have to cook in your kitchen, in the long run you'll have cabinets that yellow, grease and grime that accumulate on surfaces, and sinks and countertops that are stained and scratched… Not conducive to a sparkling white kitchen.

A considerable contributor to Yellowing white cabinets is direct sunlight, which can fade painted wood and laminated surfaces. Utilizing draperies, blinds, shades or film on your windows will shield your cabinetry from direct sunlight and make a difference in how long they stay white.

Another major contributor to yellowing is using your stove. When cooking, the aromas waft into the air in the form of microscopic food or grease particles, which land on your white cabinets where they can turn them yellow. For prevention, don’t let grease accumulate on cabinets. Turn on the exhaust fan or range hood when you boil, broil or fry foods to filter out some of those minute particles before they reach the cabinets and other surfaces. 

Writer Lorna Hordos offered this method to remove a yellow tinge: Wash cupboards with a mixture of 1 cup vinegar, 2 cups warm water and 1 tablespoon baking soda.

Also when you cook, dirt and grime accumulate from splatters spills. Never use abrasive cleansers or scouring pads on painted cabinets, as they can scratch or dull the finish. A soft cotton cloth with warm water is usually sufficient to clean your cabinets and keep them looking white. If more thorough cleaning is required, use a solution of mild dishwashing liquid mixed with warm water. After cleaning, wipe all surfaces with a clean, damp cloth. Dry immediately using another soft, clean cloth. Remember not to let those stains linger. Prolonged exposure to spills can cause permanent discoloration or damage to your cabinets’ finish.

These sinks are gorgeous and would look that way until it started to look as if it got used. It takes very little time for white sinks to look dirty and messy. Household bleach is the best way to brighten them and remove stains. Experts suggest laying paper towels flat across the bottom of the sink and wetting them with bleach to prevent the bleach from running straight down the drain. Leave the paper towels in place for half an hour to allow the bleach to do its job, then remove them and rinse the sink thoroughly with warm water.
For a more natural solution, fill the sink with club soda and lemon juice and let this mixture lift the stains as it soaks in. After you empty the sink, apply straight lemon juice directly to any stubborn stains. You may have to repeat this process several times. If this sounds like too much work, you can take a shortcut with Bar Keepers Friend. Using it on your sink every day eliminates the need for any other cleaning.

White tiles with white grout? Consider sealing the grout and don’t even contemplate living with unsealed grout. Otherwise, writer Tami Mason offers this grout remedy: Combine baking soda and vinegar with water to create a paste. Pour a little vinegar into a spray bottle. Apply the paste to the grout and then spray a light coat of vinegar onto the paste. Scrub with a scouring pad or toothbrush and rinse thoroughly.

Plastic laminate has gone from being the poor stepchild of kitchen design to a great and economical choice. But it can still stain, especially if it is white.
Hordos suggests this process to clean laminate stains: 
1. Mix a 1 part mild household detergent with 3 parts baking soda to create a firm paste.
2. Apply the baking soda solution directly to the stain and scrub with a firm-bristled nylon brush for about 20 strong brushstrokes (excess brushing may weaken the laminate finish)
3. Rinse with a damp cloth using just enough water to wipe away the baking soda and stain residue, and then buff the counter dry.

White marble or granite counters show stains easily so prevention is the best cure. Blot all spills immediately before they penetrate or dry on the surface. To make stains disappear use a solution of hydrogen peroxide with a few drops of ammonia added. The naturally occurring chemicals in peroxide and ammonia will safely remove even tough stains, or you can use a granite cleaner from Weiman, which is much easier.

And do remember that whether a kitchen is white or dark, they all have the same issues when it comes to cleanliness! White kitchens are simply less forgiving.

So if you love the look of a white kitchen, but avoid it because it will be a cleaning nightmare, look at it this way: Any kitchen is a cleaning nightmare. So prepare to roll up your sleeves, and pick the kitchen you really want.

Until next time …

Tuesday, July 15, 2014

Marble Topper

Welcome to the KitchenIslandsPlus.com blog …

Nina Hendrick of ‘Everyday Enchanting’ purchased this gorgeous marble slab on Craigslist, which kept her Do-It-Yourself project costs a bit lower. She built the base of the kitchen island and then painted and whitewashed it for a really stylish look.


Until next time …

Thursday, July 10, 2014

Vertical Kitchen

Welcome to the KitchenIslandsPlus.com blog …

Now here is a kitchen for the very imaginative! It would be ideal for a tiny house, apartment, or condo; and it would be a dream kitchen for anyone who loves order and convenience. I can see a refrigerator, microwave, dishwasher, work surface, sink, eating bar, and storage all in 1 vertical totem-like mini-tower.
Incredibly creative!!

Until next time …

Tuesday, July 8, 2014

Combination Kitchen Island

Welcome to the KitchenIslandsPlus.com blog …

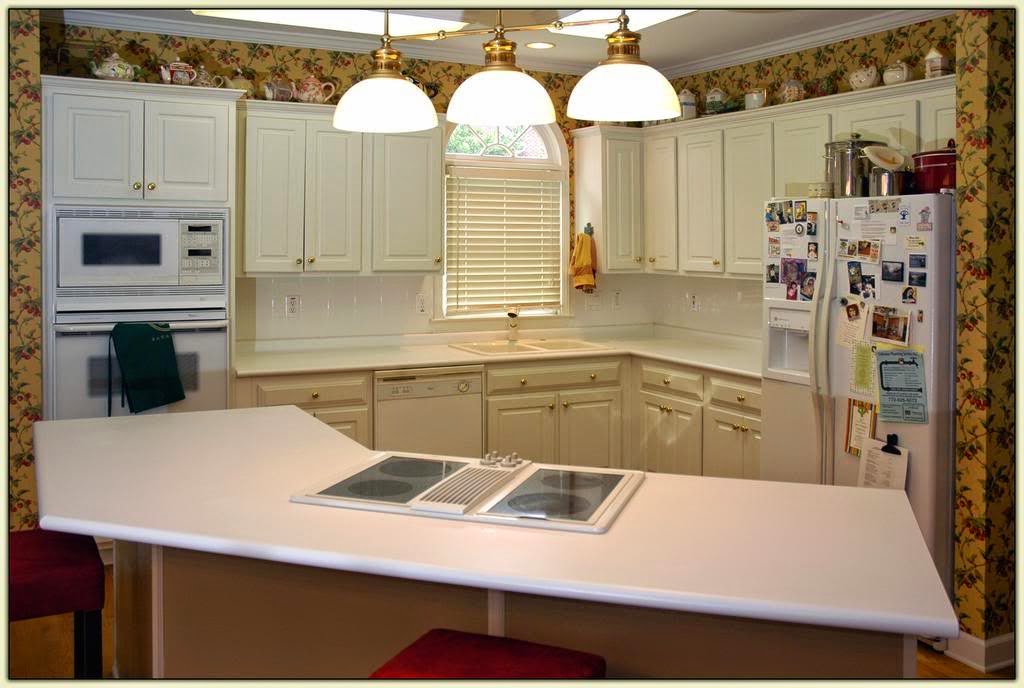
This is a great combination kitchen island. It has a wine rack and cabinets in the center, shelves on one end, and the other end is a pull-out breakfast bar with two chairs. The designer of this island really had convenience and space savings in mind!


Until next time …


Thursday, July 3, 2014

Kitchen Island Cabinets

Welcome to the KitchenIslandsPlus.com blog …

Cabinets, cabinets, cabinets -- gotta love all the varieties!

Until next time …


Tuesday, July 1, 2014

Unique Hood

Welcome to the KitchenIslandsPlus.com blog …

I just love the ambiance this gorgeous hooded kitchen island could create in a kitchen!

Until next time …

Thursday, June 26, 2014

Ugly Dresser to Kitchen Island

Welcome to the KitchenIslandsPlus.com blog!

Everyone has an old, ugly dresser that would be a better fit in a landfill than in a home. However, with a bit of spiffing up, they can make a great kitchen island! If you don’t happen to have an old ugly dresser on hand you can check garage sales or thrift stores for a cheap one. I went to http://www.remodelaholic.com for these great photos and tips.

You can make it as simple or as elaborate as you want, and you’ll want it to look as much like a piece of kitchen cabinetry as possible. In the sample here, a bead board was added to the back and an overhang/bar area extended from the top. To save on the cost of a work surface, this top is 2 pine board panels glued together that were sanded and stained and then trimmed with decorative molding. The main body was sanded, primed and painted to match the kitchen décor.

Here are some good ideas if you want to try this project:
1. Find a dresser with a combination of wide and narrow drawers. Wide ones are good for baking sheets and table linens. Narrow ones are great for cookbooks and cooking utensils.
2. Check the height of your kitchen counters. When looking for an old dresser you’ll want it to be the same height as your counters.
3. Find a dresser with a door
 to help it look less like a dresser and more like a piece intended for a kitchen. It makes great storage for small appliances such as a mixer or toaster.
4. Paint. Don’t try to stain anything but the top because it is made of so many different kinds of materials. Paint is the best bet: 2 coats of primer and 3 or 4 coats of a semi-gloss with a clear coat on top (and remember to sand first!)

Until next time …